Top places for sandboarding in Africa

By Simran Jeet | Sep 30, 2025 | 12:00 pm

**What’s the story?**

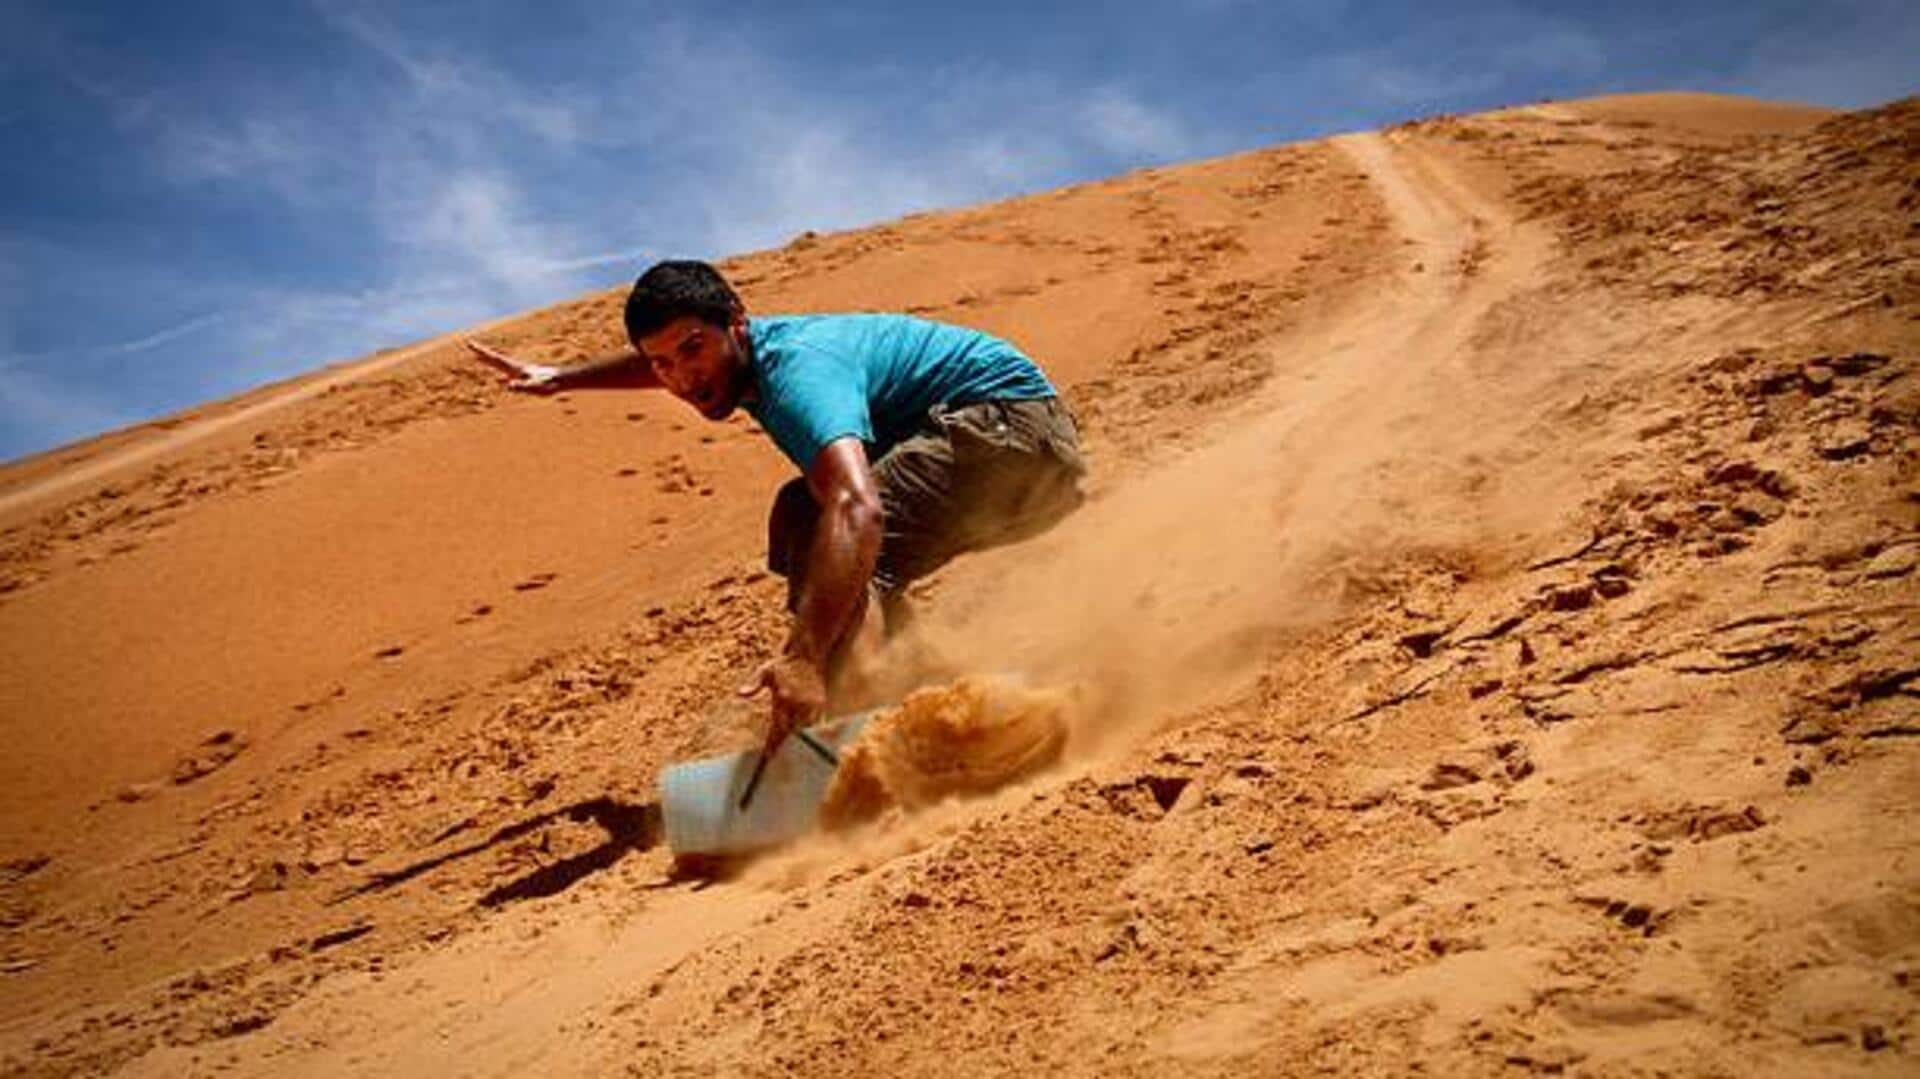
Sandboarding is an exciting sport where you glide down sand dunes on a board, much like snowboarding. Africa, with its vast deserts and towering dunes, offers some of the best places to try this thrilling activity. From Namibia to South Africa, each destination offers something unique for sandboarding enthusiasts.

Here are some of Africa’s top sandboarding spots that promise an unforgettable adventure for both beginners and seasoned riders.

### #1 Namib Desert’s Towering Dunes

The Namib Desert in Namibia is famous for its towering dunes, some of which are over 300 meters high. Swakopmund is a popular starting point for sandboarders looking to conquer these massive structures. The soft sand and steep slopes make it ideal for both beginners and pros.

The breathtaking views and the thrill of riding down these giant dunes make it a must-visit for any sandboarding enthusiast.

### #2 South Africa’s Wild Coast Adventures

The Wild Coast in South Africa is another prime destination for sandboarding lovers. The area features a number of lesser-known dunes, perfect for those looking to escape the crowds.

While the dunes here are not as high as in Namibia, they provide equally thrilling rides with varying terrains. The region’s natural beauty and remoteness add to the overall experience for adventurers.

### #3 Morocco’s Erg Chebbi Dunes

Erg Chebbi in Morocco boasts spectacular sand dunes that rise up to 150 meters. These golden sands provide an ideal surface for smooth rides, making it a favorite among those who love desert landscapes.

The area is easily accessible from Merzouga, making it a convenient spot for tourists. From sunrise to sunset, Erg Chebbi offers stunning views and exhilarating descents.

### #4 Egypt’s Great Sand Sea Experience

The Great Sand Sea in Egypt is one of the largest expanses of sand dunes in the world. Situated near Siwa Oasis, this place offers endless opportunities for exploration and adventure.

The dunes here vary in height but provide consistent conditions ideal for all skill levels. The vastness of this region makes every ride feel unique, while offering stunning vistas across the horizon.

### Tips for Safe Sandboarding Adventures

When planning your sandboarding adventure across Africa’s iconic locations, safety should be your top priority. Always wear protective gear such as helmets and pads to prevent injuries from falls or collisions with other riders on the same dune.

Carry enough water to stay hydrated under the sun’s intense heat, especially in remote areas without access points nearby.

Embark on your sandboarding journey and experience the thrill of Africa’s incredible deserts!
https://www.newsbytesapp.com/news/lifestyle/sandboarding-in-africa-top-spots-to-try/story
What does the Cauldron do & how to use it – Hades 2

The hub world in **Hades 2** offers a variety of activities, and one of the features that will catch your eye early on is the **Cauldron**. This large black pot is situated in front of Hecate, and Melinoe can interact with it to access a range of upgrades and purchases. The Cauldron includes Incantations and other items to buy—but what exactly does it all mean? Here’s what you need to know about the Cauldron.

### What is the Cauldron for?

The Cauldron serves as a central upgrade station for the hub world, allowing Melinoe to unlock new weapons, tools, and other useful items. When you interact with the Cauldron, you’ll be presented with a list of **Incantations**, which represent the various upgrades available.

Each Incantation requires a specific amount of resources to unlock, with some needing rare, late-game materials. As you progress through the game, more Incantations become available, expanding the variety of upgrades you can obtain.

### How to Use the Cauldron

To use the Cauldron, approach it and select **Interact**. From there, highlight any Incantation to view the resources needed to unlock it. If you have the required materials, you can choose to unlock the upgrade and immediately benefit from its effects.

The Incantations offer a variety of boosts, including unlocking new vendors, improving the inventory of existing NPCs, or granting access to new Aspects that enhance your weapons.

### Gathering Resources and Making Choices

As you play and fight through the game, you’ll gather materials that can be used at the Cauldron and other locations. After completing a run, return to the Cauldron to check if you have enough resources to purchase any new upgrades.

When you first start, it’s a good idea to unlock whatever upgrades the game recommends. However, as you continue to progress, you’ll want to consider your playstyle and strategy more carefully. While you’ll eventually unlock all Incantations, the order in which you choose to do so can greatly influence your experience.

The Cauldron is a key part of enhancing your journey through Hades 2, providing valuable upgrades and new options to customize your gameplay. Keep an eye on your materials and plan your purchases wisely!
https://www.shacknews.com/article/146097/what-does-the-cauldron-do-hades-2

What does the Cauldron do & how to use it – Hades 2

The hub world in *Hades 2* offers plenty to explore, and one feature that grabs your attention early on is the Cauldron. This large black pot sits prominently in front of Hecate, and Melinoe can interact with it. The Cauldron contains Incantations and other items available for purchase—but what exactly do they all mean? Here’s what you need to know about the Cauldron.

### What is the Cauldron for?

The Cauldron is used to upgrade the hub world and unlock new weapons, tools, and other items for Melinoe to purchase. When you interact with the Cauldron, you’ll see a list of different Incantations. These Incantations act as upgrades, each costing varying amounts of resources. Some upgrades require rare or late-game materials.

As you progress through *Hades 2*, more Incantations will become available in the Cauldron, expanding your options and enhancing your gameplay experience.

### How to Use the Cauldron

To use the Cauldron, simply approach it and select **Interact**. Highlight an Incantation to view the resources needed to unlock it. If you have the required materials, you can purchase the upgrade and immediately benefit from its effects.

Incantations offer a variety of benefits. Some will unlock new vendors, while others improve what NPCs sell. Additionally, there are upgrades that grant Aspects, which let you enhance your weapons.

### Tips for Using the Cauldron

As you fight through the game, you’ll collect materials that can be used at the Cauldron and for other purposes. After each run, be sure to return to the Cauldron and check if you can afford new upgrades.

When you’re just starting out, it’s safe to unlock whatever the game recommends. However, as you progress, consider your playstyle carefully before purchasing upgrades. While you’ll eventually unlock all Incantations, the order in which you do so can significantly impact your journey.

In summary, the Cauldron is a crucial feature in *Hades 2* for improving your character’s abilities and expanding what’s available in the hub world. Use it wisely to tailor your experience and strengthen Melinoe as you delve deeper into the game.
https://www.shacknews.com/article/146097/what-does-the-cauldron-do-hades-2

How to get Cinder – Hades 2

In **Hades 2**, there are numerous upgrade materials to collect, and one of the first essential resources you’ll need is **Cinder**. This valuable material is used early on to purchase a few weapons and, later in the game, to acquire powerful Arcana Cards. However, farming Cinder can be challenging, especially when you’re just starting out.

### How to Get Cinder

Cinder is earned by defeating **Hecate**, the boss at the end of the Erebus section of a run. Each time you clear this boss, you receive one piece of Cinder. This means you can farm a steady supply by repeatedly replaying the first section of Hades 2.

You’ll need several dozen pieces of Cinder to unlock all of the **Nocturnal Arms** from the Silver Pool and to upgrade them fully. Besides weapon upgrades, Cinder is also necessary for Meditating to acquire new cards and for using the Cauldron.

### Tips for Farming Cinder

The biggest hurdle in collecting Cinder is defeating Hecate consistently. To improve your chances:

– **Unlock and upgrade Keepsakes**: Certain Keepsakes can provide significant buffs or advantages during the boss fight.
– **Focus on your build**: Tailor your weapon upgrades and Arcana cards to counter Hecate’s attack patterns.

Taking the time to prepare properly will make farming Cinder much more manageable and help you progress faster in Hades 2.
https://www.shacknews.com/article/146104/farm-cinder-hades-2

Rock climbing in Morocco: Top routes to explore

**Rock Climbing in Morocco: Top Routes to Explore**
*By Simran Jeet | Sep 25, 2025 | 10:51 AM*

Marrakech, Morocco, is not just a cultural hub but also a gateway to some of the most thrilling rock climbing routes in Africa. The Atlas Mountains, located just a short drive from the city, offer climbers an array of challenges and breathtaking views. Whether you are a seasoned climber or a beginner looking for adventure, these routes promise an unforgettable experience amidst stunning landscapes and rich history.

### Discovering the Atlas Mountains

The Atlas Mountains are a climber’s paradise, boasting diverse terrain and varying difficulty levels. From limestone cliffs to sandstone formations, the mountains have it all. Known for their rugged beauty, the area offers routes that cater to all skill levels. Climbers can enjoy both traditional and sport climbing routes, making it an ideal destination for those looking to test their limits.

### Popular Climbing Spots Near Marrakech

One of the most popular climbing spots is Todra Gorge, famous for its dramatic cliffs and narrow passageways. The gorge provides over 400 climbing routes, ranging from easy to extremely difficult, suitable for all types of climbers.

Another favorite destination is Jebel Toubkal, North Africa’s highest peak, which offers challenging ascents and breathtaking panoramic views from the summit. Both Todra Gorge and Jebel Toubkal are easily accessible from Marrakech, making them perfect options for day trips or extended climbing excursions.

### Essential Tips for Climbers

Before embarking on your climbing adventure near Marrakech, make sure you are well-prepared. Carry all necessary gear including ropes, harnesses, helmets, and climbing shoes. Weather conditions in mountainous regions can change rapidly, so always check forecasts before you go.

Hiring a local guide is highly recommended, as they can provide valuable insights into the terrain and help ensure your safety during climbs.

### Cultural Experiences in Marrakech

While visiting the area for rock climbing, don’t miss the chance to experience Marrakech’s rich culture. Explore the local markets, or souks, where you can find traditional crafts and souvenirs to take home as mementos of your trip.

Additionally, be sure to try authentic Moroccan cuisine at local restaurants or cafes. Many dishes are made with fresh ingredients sourced from nearby farms and markets, offering a true taste of the region.

Explore the best of both adventure and culture in Morocco, where every climb is complemented by the warmth and vibrancy of Marrakech.
https://www.newsbytesapp.com/news/lifestyle/rock-climbing-in-morocco-top-routes-to-explore/story

The beautiful destination 5 hours from UK that boasts 29C in October and turquoise lagoons

The Red Sea, popularized by famous winter sun destinations like Sharm El Sheikh and Hurghada in Egypt, is usually a go-to for winter sun seekers. Perfect weather year-round and mid-length flights further boost the ideal conditions for holidaymakers on our side of the world. Not to mention, holiday packages can make planning a trip on short notice a lot easier.

However, for those looking for something a little more exclusive, yet surprisingly attainable, there is a spot well-known to Egyptians and kitesurfing enthusiasts—but yet to be discovered by Britons. It’s a little oasis of beauty and comfort: El Gouna.

Located just 30 minutes north of Hurghada, El Gouna is a plush, self-contained resort town that boasts a world of activities and a range of lavish hotels catering to all types of getaways—from honeymoons to family holidays and golfing trips.

During my 5-night holiday, I was able to sample only a few of the many excursions and comforts this town has to offer. My adventure started with a thrilling desert quad bike safari, where I visited a Bedouin encampment at sunset.

Staying at the Steigenberger Golf Resort offered an outlook into the more mature, relaxed side of the resort, where crowds vary from families with young children to seniors golfing on the hotel’s own 18-hole championship golf course located on the other side of the lagoon.

Other parts of the town lend themselves to a more active stay, like the famed Mangroovy Beach—one of the most popular spots among kitesurfers—and the sophisticated Casa Cook Hotel, which is adjacent to a kite centre for those who like to get up and go.

As well as stunning golden sand beaches, El Gouna is home to incredible coral reefs and wrecks, such as the famous Sha’ab El Erg and Careless Reef, which can be explored on snorkeling and diving tours.

Transfers within the town take no longer than 20 minutes, making it easy—and highly recommended—to plan a variety of activities within a day. For those seeking a truly local experience, tuk-tuks provide a whimsical way to explore the town, allowing for spontaneous stops that make exploring fun and effortless.

When it comes to dining and nightlife, Abu Tig Marina and the Downtown area are the places to be. These lively spots feature local shops and restaurants with something for everyone.

At dusk and in the evening, these areas come to life as hotspots for visitors looking to try different cuisines—ranging from the top-rated African eatery Bongoyo to Camino, a lively Latin restaurant.

I’d strongly recommend anyone visiting El Gouna to create their own scent as a holiday keepsake at Norshek, a charming store selling hair and body products made with natural oils. Here, you can customize your body butter, hand wash, perfume, or hair conditioner to your liking.

Try a blend of oud and pomegranate for a sweet and indulgent, long-lasting mix.

For Indian food lovers, Tandoor is a must-visit. Not only does it boast a privileged location overlooking the entire marina, but it also offers superb fare with all the classics plus a few unique fusion dishes.

Fanadir Marina offers a more upscale, quieter atmosphere where diners can enjoy uninterrupted views of docked boats while savoring a dimly lit supper or shopping for clothes.

Among the dining options, Villa Caracas is the place to go for traditional Lebanese cuisine, while the neighboring restaurant Marzipan serves authentic Egyptian fare in abundant portions that are ideal for sharing.

Another highlight of El Gouna is its proximity to Luxor, a day tour that begins with a surreal drive through the desert and showcases some of Egypt’s most spectacular landmarks. These include the colossal Karnak Temple and the Valley of the Kings—an ancient royal burial ground from Egypt’s New Kingdom.

For those staying overnight in Luxor, adventurers can enjoy a hot air balloon ride at sunrise. This offers stunning views of many ancient landmarks, including the imposing mortuary temple of Hatshepsut, and a striking contrast between the lush, cultivated fields lining the Nile River and the surrounding desert and mountains.
https://www.express.co.uk/travel/articles/2111424/beautiful-beach-destination-warm-october-weather

Borderlands 4: All Safehouses and datapad locations

Safehouses in Borderlands 4: Locations and Datapads Guide

Safehouses in Borderlands 4 are one of the key ways to fast-travel across the expansive world of Kairos. Since your quests often take you from one corner of the map to another, relying solely on your hoverbike can become time-consuming. Fast-traveling through Safehouses saves considerable time, especially when replaying the campaign with another character.

To secure a Safehouse, you’ll need to find its corresponding datapad. There are fourteen Safehouses in Borderlands 4, scattered across the four major regions. This guide will walk you through the location of every Safehouse along with the location of their datapads.

All Safehouse and Datapad Locations in Borderlands 4

Fadefields Region

  1. Abandoned Post (Coastal Bonescape)
    The Abandoned Post is the first Safehouse you unlock in Borderlands 4, introduced during the first main quest, Recruitment Drive, after joining the Crimson Raiders. Claptrap will bring you here and task you with defeating your first boss and securing a jetpack, which you use to climb to the Safehouse entrance. The datapad is located on a console inside. Grab it to secure the Safehouse and advance the story.
  2. Shut-Eye Keep (The Howl)
    Early in the game, you can access Shut-Eye Keep by using the lift at the base of the tower near the pond. You can bypass enemies guarding the area and head directly to the top. The datapad is near a lantern on top of some boxes inside the vendor shop. Look for a grapple point in the upper left corner of the room to reach it.
  3. Someday Rise (Idolators Noose)
    Located on top of a hill, Someday Rise requires you to approach from the back. Head toward the Fortress Indomita entrance, then find a Ripper drill on the right side; from there, stairs and grapple points lead upwards. Defeat all manglers roaming nearby. The datapad is inside a tent in the right corner. Use it to secure the Safehouse.
  4. Wyclefs Reprieve (Idolators Noose)
    This Safehouse lies across the bridge to the Tipping Point bunker on the right side of Fortress Indomita. Enter the building, go to the destroyed deck, and jump down onto some boxes to find the datapad. Nearby caves lead back up, allowing you to unlock the Safehouse.

Terminus Range Region

  1. Grey Havenge (Cuspid Climb)
    Grey Havenge resembles a monastery and is close to the lift leading to the upper section of Terminus Range. The datapad is on one of the houses in front of the Safehouse. Use your grapple hook to scale a climbable wall, grab the datapad, then glide with your booster to return and secure the area.
  2. Heritage Opus (Cuspid Climb)
    A multi-section Safehouse in Cuspid Climb. Scale a climbable wall to reach the first section; enemies can be ignored here. Continue to the other side to find a grapple hook leading to the second section. After climbing another wall to the top, you’ll find the datapad atop a bell shrine.
  3. Snowy Wells (Stoneblood Forest)
    To reach Snowy Wells, parkour across platforms while under fire. At the Safehouse, grapple to another hill on the right side, climb the platforms on the mountain, and glide toward a nearby generator to collect the datapad. Glide back and secure the location once done.
  4. The Nightcap (Windspear)
    Situated inside a cave in the right corner of Windspear, The Nightcap is one of the easiest Safehouses to unlock. Upon entering, find a climbable wall on the left, ascend to the top, then glide to the ledge containing the datapad. The door below should then open, allowing you to claim the Safehouse.

Carcadia Burn Region

  1. Makeshift Chalet (Lopside)
    The first Safehouse upon entering Carcadia Burn from Fadefields. The location is heavily guarded by The Order faction. To find the datapad, go to the left side of the large building with a big antenna. Jump down and locate the key on a box. Use a grapple spot and climbable wall nearby to return to the top and secure the Safehouse.
  2. The Lowrise (Tonnage Peel)
    Near the Crumbled Lurch Ancient Crawler, access The Lowrise via a grapple point on a broken pipe near an “Out of Order” board. Maneuver across the platforms to reach the Safehouse. The datapad is on a broken piece of concrete hanging by a metal rod to the left of the building.
  3. Wildhorns Beard (Ruined Sumplands)
    Located on a large island separated by a broken bridge, Wildhorns Beard is a rundown Safehouse seldom used due to better fast travel points nearby. To find the datapad, navigate around a large hill and locate a Kratch nest. Retrieve the required item and return to the ruined building to unlock the Safehouse.

Timekeepers Dominion Region

  1. The Lockaway (Carcadia District)
    Part of the Falling Wall quest unlocked after defeating the main bosses of the first three regions. The Electi faction leader, Levaine, guides you here to use the Safehouse as a base. The entrance is hidden behind a hologram of Timekeeper—look for a grapple hook there. Follow stairs to the top and find the datapad on a table.
  2. The Food Court (Terminus District)
    Entering the Terminus District by crossing the district wall, find The Food Court on the left after exiting the door. The area is infested with Ripper faction enemies—defeat them to safely activate the terminal. The datapad is located on top of a garbage dump near the Evolving Chili food stall, while the activation terminal is near the “All You Can Eat” sign.
  3. Sumpview Falls (Fades District)
    The final Safehouse you unlock, accessible only after advancing through Plan Z of the main story quest. Located centrally in the Fades District inside a small drainage ditch. The datapad is inside a small wall opening—use the ladder to climb up and retrieve it.

That covers all fourteen Safehouses in Borderlands 4. While other fast travel points exist, such as the Order Silos, Safehouses are spread widely across the map, offering quick travel access to multiple pivotal locations.

More Borderlands 4 Guides

https://www.sportskeeda.com/mmo/borderlands-4-all-safehouses-datapad-locations

How to level up fast in Dying Light: The Beast

Dying Light: The Beast is primarily an action game, but it also incorporates light RPG mechanics through its equipment and leveling system. Consistent leveling is crucial since you never want to fall too far behind the power level of the enemies you face. Here’s how to level up quickly and efficiently in Dying Light: The Beast.

### The Best Ways to Level Up in Dying Light: The Beast

While almost every activity in Dying Light: The Beast grants experience points (XP), there are two main approaches beyond the main story missions that you should focus on to level up fast:

– **Side Quests**
– **World Activities** such as Safe Spots and other white-iconed locations on the map

#### Side Quests

Side quests are optional missions you unlock as you progress through the game and explore its world. Early on, these quests can award around 4,000 XP, but some early side quests offer 10,000 XP, and late-game quests provide up to 20,000 XP upon completion.

Don’t expect side quests to be simple tasks, either. Most take anywhere from 10 to 15 minutes if they’re on the shorter side, or up to half an hour if they’re more involved. Besides the XP rewards, these quests often grant valuable items and resources. However, leveling up is typically the primary reason to seek them out.

#### World Activities

There are various world activities worth pursuing. Safe Houses and other quick platforming or combat challenges typically reward between 2,000 to 3,000 XP each. Beyond XP, these activities often grant crafting recipes, resources, and sometimes additional gear.

Safe Houses are especially valuable. As their name suggests, they are completely safe from zombies and can even instantly end a chase involving a Volatile. Additionally, resources in Safe Houses respawn over time, giving you another reason to revisit them as you progress through the game.

By prioritizing side quests and world activities like Safe Houses, you can efficiently level up and stay prepared for the increasingly dangerous challenges that Dying Light: The Beast has to offer.
https://www.shacknews.com/article/146003/how-to-level-up-fast-in-dying-light-the-beast

Exit mobile version